1. 什么是WebRTC
1.1 WebRTC简介
WebRTC,名称源自网页即时通信(英语:Web Real-Time Communication)的缩写,是一个支持网页浏览器进行实时语音对话或视频对话的实时通信框架,提供了一系列页面可调用API。
参考定义:
谷歌开放实时通信框架
在上一篇博客
Vue +WebSocket + WaveSurferJS 实现H5聊天对话交互 中,已经涉及到WebRTC接口的使用,使用到了getUserMedia方法,用于通过浏览器获取设备麦克风,从而采集音频。
最近项目中的需求则是与服务端建立即时通信,实现低延迟音视频直播。
RTC的特征是(参考来源:https://www.zhihu.com/question/22301898)
- 复杂度较高
- 半可靠传输,对于特定情境(比如网络环境较差时)可以对音视频进行有损传输,降低延迟
- 音视频友好:可针对音视频做定制化优化
- 提供端对端优化方案。 对于传统连接模式,使用C/S架构,A=>服务端=>B,而WebRTC使用的是
peer-to-peer模式,A=>B,一旦点和点之间的连接形成,它们之间的数据传输是不经过服务端的,大大降低了服务端的压力。
- 理论延迟较低,能应用在各种低延迟场景。
2. 业务描述
功能描述:
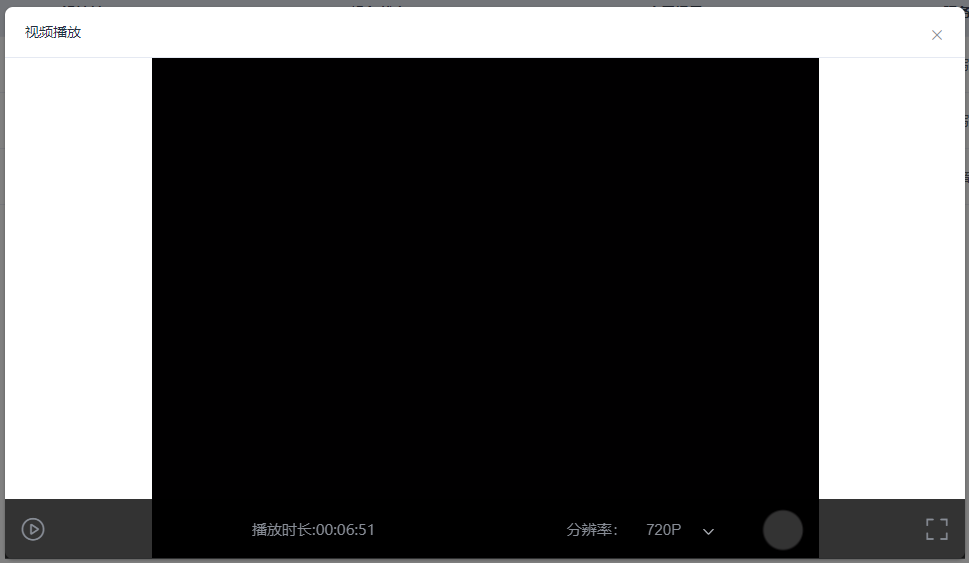
实现对摄像设备的管理列表,在设备列表点击查看视频时,弹出页面浮窗,进行摄像机摄像的视频和音频实时转播。
视频弹窗下方有自己实现的控制条,实现播放/暂停控制,能显示播放时间、切换分辨率、是否全屏等。
效果如图:
3. 代码实现
3.1 Html模板代码
<el-dialog ref="videoDialog" title="视频播放" :visible.sync="dialogShowed" :close-on-click-modal="false">
<div id="dialog-wrap">
<div id="video-wrap" v-if="isSuccess" v-loading="isLoading" element-loading-text="视频加载中" element-loading-spinner="el-icon-loading"
element-loading-background="rgba(0, 0, 0, 0.8)" />
<div class="video-onloading" v-else v-loading="isLoading" element-loading-text="视频加载中" element-loading-spinner="el-icon-loading"
element-loading-background="rgba(0, 0, 0, 0.8)">
<span><i class="el-icon-error" v-if="!isLoading" />{{errorMessage}}</span>
</div>
<!-- 遮罩层 -->
<div class="cover" v-if="isSuccess">
<div class="controls">
<i class="el-icon-video-play" v-if="!isPlaying" @click="playOrPauseVideo" />
<i class="el-icon-video-pause" v-else @click="playOrPauseVideo" />
<div id="currentTime">播放时长:{{currentTime}}</div>
<div class="control-resolution">
分辨率:
<el-select v-model="selectResolution" @change="changeResolution">
<el-option v-for="item in resolutions" :key="item" :value="item">
{{item}}
</el-option>
</el-select>
</div>
<i class="el-icon-full-screen" @click="onClickFullScreen"></i>
</div>
</div>
</div>
</el-dialog>
3.2 建立连接、接收音频
getVideo() {
let that = this;
that.isLoading = true;
that.pc = new RTCPeerConnection();
that.pc.addTransceiver("video");
that.pc.addTransceiver("audio");
that.pc.ontrack = function (event) {
var el = document.createElement(event.track.kind);
el.srcObject = event.streams[0];
el.autoplay = true;
document.getElementById("video-wrap").appendChild(el);
if (el.nodeName === "VIDEO") {
el.oncanplay = () => {
that.isLoading = false;
// 播放状态设置为true
that.isPlaying = true;
that.getVideoDuration();
};
} else if (el.nodeName === "AUDIO") {
el.oncanplay = () => {
};
}
};
that.pc
.createOffer()
.then((offer) => {
that.pc.setLocalDescription(offer);
let req = {
webrtc: offer,
};
console.log(offer);
return that.$api.device.getSignaling(
that.deviceData.id,
that.origin,
that.selectResolution,
req
);
})
.then((res) => {
if (res.code === 0) {
that.isSuccess = true;
that.pc.setRemoteDescription(res.body.webrtc);
that.connId = res.body.connId;
} else {
that.errorMessage = res.message || "视频加载错误";
}
})
.catch(alert);
}
参考https://www.jianshu.com/p/43957ee18f1a,查看Peer Connection建立连接的流程。
参考
https://developer.mozilla.org/zh-CN/docs/Web/API/RTCPeerConnection 查看RTCPeerConnection 支持的接口
createOffer() 方法: 主动与其他peer建立P2P连接,把自己的SDP信息整理好,通过signaling server转发给其他peer。
在上面的代码中,通过向后端发送POST请求,实现信令交换。
that.pc.addTransceiver("video");
that.pc.addTransceiver("audio");
指明同时接收音频和视频。
that.pc.ontrack = function(event){
}
该方法进行音视频的接收,使用接收到的数据创建video和audio元素。
只对pc状态进行监听无法监听到实际视频可以播放的状态,因此需要对video添加监听方法:
el.oncanplay = () => {
that.isLoading = false;
// 播放状态设置为true
that.isPlaying = true;
that.getVideoDuration();
};
在video可以播放时,才将loading状态取消,并开始获取video时长。
3.3 控制音视频的JS代码
获取视频播放时长方法:
getVideoDuration() {
var video = document.getElementsByTagName("video")[0];
// 如果没有获取到视频元素
if (!video) {
return;
}
let that = this;
video.addEventListener("timeupdate", () => {
that.currentTime = getTime(video.currentTime);
});
var getTime = function (time) {
let hour =
Math.floor(time / 3600) < 10
? "0" + Math.floor(time / 3600)
: Math.floor(time / 3600);
let min =
Math.floor((time % 3600) / 60) < 10
? "0" + Math.floor((time % 3600) / 60)
: Math.floor((time % 3600) / 60);
var sec =
Math.floor(time % 60) < 10
? "0" + Math.floor(time % 60)
: Math.floor(time % 60);
return hour + ":" + min + ":" + sec;
};
}
控制音频/视频同步暂停的方法:
playOrPauseVideo() {
var video = document.getElementsByTagName("video")[0];
var audio = document.getElementsByTagName("audio")[0];
if (this.isPlaying) {
video.pause();
audio.pause();
} else {
// audio
video.play();
audio.play();
}
this.isPlaying = !this.isPlaying;
}
全屏方法
onClickFullScreen() {
let dialogElement = document.getElementById("dialog-wrap");
dialogElement.webkitRequestFullScreen();
}
3.4 样式表
样式部分较为简单,值得注意的有以下几点:
video::-webkit-media-controls {
/* 去掉全屏时显示的自带控制条 */
display: none !important;
}
- 扩大hover热区,视频下半部分(高度为400px部分)悬浮显示控制条
(不设置为全部部分是因为如果设置为全部部分,则全屏状态无法隐藏控制条)
以下完整样式表(
scss):
$controlFontColor: rgb(136 141 150);
$backgroundColor: rgba(0, 0, 0, 0.8);
$height: 60px;
.el-dialog .el-dialog__body {
padding: 0 !important;
margin-bottom: 0 !important;
width: unset !important;
}
.video-onloading {
min-height: 500px;
background-color: $backgroundColor;
span {
width: 100%;
display: block;
line-height: 500px;
text-align: center;
color: $controlFontColor;
i {
margin-right: 5px;
}
i::before {
font-size: 17px;
}
}
}
.cover {
bottom: 0px;
height: 300px;
position: absolute;
width: 100%;
z-index: 2;
&:hover,
&:focus,
&:focus-within {
.controls {
display: flex;
}
}
}
.controls {
width: 100%;
height: $height;
line-height: $height;
font-size: 15px;
display: none;
z-index: 2;
background-color: $backgroundColor;
color: $controlFontColor;
position: absolute;
bottom: 0
justify-content: space-between;
& > [class^="el-icon-"] {
&::before {
font-size: 26px;
line-height: $height;
padding: 0 15px;
cursor: pointer;
}
}
.playStatus {
width: 64px;
height: $height;
position: absolute;
top: 50%;
left: 50%;
transform: translate(-50%, -50%);
}
#currentTime {
width: 140px;
height: $height;
text-align: center;
}
.control-resolution {
line-height: $height;
.el-input__inner {
background: $backgroundColor;
}
.el-input {
width: 95px;
}
input {
border: none;
font-size: 15px !important;
color: $controlFontColor;
&::-webkit-input-placeholder {
color: $controlFontColor;
}
}
}
#fullScreen {
width: 32px;
height: 32px;
position: relative;
top: 16px;
}
}
总结
本次的前端业务WebRTC只做了浅显的了解和应用,只应用了接收流,还没有用到推流,WebRTC还有更多用法,比如实现实时视频通话、语音通话等,也许以后的业务中会用到,所以以这篇博客做一个入门记录~
%20--%3E%0A%3Csvg%20width%3D%22400%22%20height%3D%22362.25%22%20version%3D%221.1%22%20viewBox%3D%220%200%20105.83%2095.845%22%20xml%3Aspace%3D%22preserve%22%20xmlns%3D%22http%3A%2F%2Fwww.w3.org%2F2000%2Fsvg%22%3E%3Cg%20transform%3D%22matrix(.713%200%200%20.713%2077.075%2071.416)%22%20fill%3D%22none%22%20stroke%3D%22%2320b2aa%22%3E%3Cg%20transform%3D%22matrix(1.7758%200%200%201.7758%20-218.04%20-53.747)%22%3E%3Cg%20transform%3D%22matrix(1.0075%200%200%201.0075%20-117.66%20-102.15)%22%20fill%3D%22none%22%20stroke%3D%22%23008000%22%3E%3Cg%20transform%3D%22translate(6.3294%2021.625)%22%3E%3Cg%20transform%3D%22translate(2.2098%2031.932)%22%3E%3Cg%20transform%3D%22translate(143.47%20-53.536)%22%20stroke%3D%22%2320e0cd%22%3E%3Cpath%20transform%3D%22translate(-2.2098%20-31.932)%22%20d%3D%22m81.211%20180.38%2019.707%200.26372%22%20stroke-width%3D%223.683%22%2F%3E%3Cg%20transform%3D%22translate(-.36252)%22%3E%3Cpath%20d%3D%22m89.544%20146.87v-6.794%22%20stroke-width%3D%222.6458%22%2F%3E%3Cpath%20d%3D%22m88.77%20141.34%206.6272-8.1886%22%20stroke-width%3D%222.3347%22%2F%3E%3Cpath%20d%3D%22m89.919%20141.46-5.5766-5.8386%22%20stroke-width%3D%222.3102%22%2F%3E%3C%2Fg%3E%3Ccircle%20cx%3D%22100.95%22%20cy%3D%22126.47%22%20r%3D%226.9136%22%20stroke-width%3D%222.6458%22%2F%3E%3Ccircle%20cx%3D%2279.351%22%20cy%3D%22130.4%22%20r%3D%225.0854%22%20stroke-width%3D%222.6458%22%2F%3E%3C%2Fg%3E%3C%2Fg%3E%3C%2Fg%3E%3C%2Fg%3E%3Cg%20transform%3D%22matrix(1.4025%200%200%201.4025%2078.297%20-26.312)%22%20fill%3D%22none%22%20stroke%3D%22%232e8b57%22%3E%3Ccircle%20cx%3D%2234.846%22%20cy%3D%2231.29%22%20r%3D%223.9152%22%20stroke-width%3D%221.8521%22%2F%3E%3Ccircle%20cx%3D%224.8413%22%20cy%3D%2231.29%22%20r%3D%223.9152%22%20stroke-width%3D%221.8521%22%2F%3E%3Cpath%20d%3D%22m9.2604%2052.775h21.167%22%20stroke-width%3D%222.6458%22%2F%3E%3Cpath%20d%3D%22m19.844%2053.834v-37.849%22%20stroke-width%3D%222.5838%22%2F%3E%3Cg%20stroke-width%3D%222.6458%22%3E%3Ccircle%20cx%3D%2219.844%22%20cy%3D%227.1851%22%20r%3D%225.739%22%2F%3E%3Cpath%20d%3D%22m6.6146%2037.959%205.2917%205.2917h7.9375%22%2F%3E%3Cpath%20d%3D%22m33.073%2037.959-5.2917%205.2917h-7.9375%22%2F%3E%3C%2Fg%3E%3Ccircle%20cx%3D%2231.804%22%20cy%3D%2217.056%22%20r%3D%223.9152%22%20stroke-width%3D%221.3229%22%2F%3E%3Ccircle%20cx%3D%227.884%22%20cy%3D%2217.056%22%20r%3D%223.9152%22%20stroke-width%3D%221.3229%22%2F%3E%3Cpath%20d%3D%22m9.2604%2023.406%2010.583%202.6458%2010.583-2.6458%22%20stroke-width%3D%222.6458%22%2F%3E%3C%2Fg%3E%3Cg%20transform%3D%22translate(61.911%20-10.894)%22%3E%3Cpath%20d%3D%22m8.1887%2058.6h23.31%22%20stroke-width%3D%223.7108%22%2F%3E%3Cg%20transform%3D%22translate(0%203.7438)%22%3E%3Ccircle%20cx%3D%2233.971%22%20cy%3D%2233.263%22%20r%3D%224.79%22%20stroke%3D%22%2320b2aa%22%20stroke-width%3D%221.8527%22%2F%3E%3Ccircle%20cx%3D%225.716%22%20cy%3D%2233.263%22%20r%3D%224.79%22%20stroke-width%3D%221.8521%22%2F%3E%3Cg%20stroke-width%3D%222.6458%22%3E%3Cpath%20d%3D%22m19.844%2053.743v-25.896%22%2F%3E%3Ccircle%20cx%3D%2219.844%22%20cy%3D%2218.683%22%20r%3D%227.0212%22%2F%3E%3Cpath%20d%3D%22m6.8958%2040.795%2012.948%203.237%2012.948-3.237%22%2F%3E%3C%2Fg%3E%3C%2Fg%3E%3C%2Fg%3E%3C%2Fg%3E%3C%2Fg%3E%3C%2Fsvg%3E%0A)