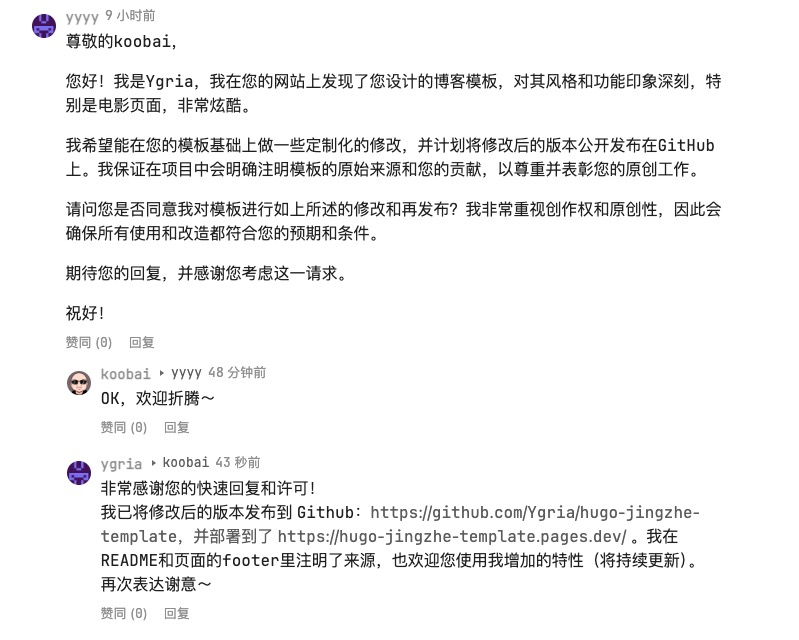
看到一个很棒的博客:
https://koobai.com/ ,博客原作者也很大方地将源码公开放到了Github上。对电影页面非常眼馋,征得作者同意后,我对他的模版进行了一些小改造,发布到了Github上,也将自己的博客也从原Hexo引擎迁移到了Hugo。
迁移和改造
文章迁移
Hexo与Hugo都基于MD文件的生成,所以除了修改了Front Matter中date时间格式外,迁移成本几乎为0,把之前的文章(.md)都挪到hugo的博客文件夹下就行了。
原: source/_post
现: content/posts
复制Koobai Github项目中theme/jingzhe_2,并在博客配置文件hugo.toml中指定即可。
theme = "jingzhe_2"
themesDir = "themes"
电影页面的生成
Github Action配置
看了一下电影页面,是使用了Github Action自动化执行功能,从自己的豆瓣账号去拉取数据存在本地。有现成的轮子可以用,自己配置一个也很简单。
在项目的根目录下新建文件夹.github/workflows(注意拼写),新建douban.yaml
name: douban
on:
push:
branches:
- main
workflow_dispatch:
inputs:
douban-name:
description: 'DouBan Id'
required: false
concurrency:
group: ${{ github.workflow }}-${{ github.ref }}
cancel-in-progress: true
jobs:
sync:
name: Douban Sync
runs-on: ubuntu-latest
env:
DOUBAN_NAME: ${{ github.event.inputs.douban-name || secrets.DOUBAN_NAME }}
REF: ${{ github.ref }}
REPOSITORY: ${{ github.repository }}
YEAR: ${{ vars.YEAR }}
steps:
- name: Checkout
uses: actions/checkout@v3
- name: Set up Python
uses: actions/setup-python@v4
with:
python-version: 3.11
- name: Install dependencies
run: |
python -m pip install --upgrade pip
pip install -r scripts/douban-requirements.txt
- name: Douban Movie sync
run: |
python -u scripts/douban.py
- name: Commit changes
uses: EndBug/add-and-commit@v8
with:
author_name: DOUBAN Sync # 提交者的GitHub用户名
author_email: DOUBAN Sync # 提交者的电子邮件
message: 'Automatically commit changes' # 提交信息
add: '.' # 添加当前目录下的所有变更
为了方便调试,我增加了workflow_dispatch的触发方法(可从Github页面手动触发),并支持在手动触发输入豆瓣账号ID。非手动触发时,应将DOUBAN_NAME配置到secrets中。
工作流的默认工作目录是项目的根目录,我们在根目录下新建文件夹scripts,并添加执行脚本douban.py(省略部分内容):
image_save_folder = 'static/images/douban/'
json_movie_path = 'data/douban/movie.json'
json_book_path = 'data/douban/book.json'
movie_status = {
"mark": "想看",
"doing": "在看",
"done": "看过",
}
@retry(stop_max_attempt_number=3, wait_fixed=5000)
def fetch_subjects(user, type_, status):
offset = 0
page = 0
url = f"https://{DOUBAN_API_HOST}/api/v2/user/{user}/interests"
total = 0
results = []
/** 调用豆瓣接口获取数据 **/
def downloadImgs(image_url, id):
# 确保文件夹路径存在
os.makedirs(image_save_folder, exist_ok=True)
file_name = "{id}.jpg".format(id=id)
save_path = os.path.join(image_save_folder, file_name)
def insert_movie():
results = []
for i in movie_status.keys():
results.extend(fetch_subjects(douban_name, "movie", i))
# 确保文件的父目录存在
os.makedirs(os.path.dirname(json_movie_path), exist_ok=True)
# 检查文件是否存在
if not os.path.exists(json_movie_path):
# 文件不存在时,创建文件
open(json_movie_path, 'w').close() # 创建一个空文件
print("File created.")
json_data = []
for item in results:
# 下载图片文件
downloadImgs(item["subject"]["pic"]["large"], item["id"])
# 准备要追加的数据
new_data = {}
json_data.append(new_data)
with open(json_movie_path, mode='w', newline='', encoding='utf-8') as file:
json.dump(json_data, file, indent=4, ensure_ascii=False)
if __name__ == "__main__":
douban_name = os.getenv('DOUBAN_NAME')
if not douban_name:
print('Douban name is not set')
sys.exit(1)
else:
print(f"DOUBAN_NAME = {douban_name}")
insert_movie()
爬取豆瓣数据,并以json格式存储。这里为了生成海报,将封面海报下载到了静态仓库内。这里也可以不下,渲染时使用一些三方API或用自己图床/代理worker,由于我豆瓣标记也不是很多,所以就选择静态文件了。
页面渲染
原页面基于csv渲染,改成从json文件渲染需要一些小改动,将getCSV改成getJSON,从下标读改为从属性即可。
增加了基于css选择器的过滤。
照葫芦画瓢的读书页
本着对豆瓣爬都爬了都心理,顺便也生成了读书页。基本是对电影页面的复制粘贴。
制作归档页
在pages/ 下新增了归档.md
---
title: '归档'
url: "archive"
date: 2023-01-30
layout: archive
menu:
main:
name: "归档"
weight: 12
---
在主题文件夹下layouts/_default中,新增archive.html,基于标签和年份进行归档。
<div class="content_zhengwen">
<div class="tabs">
<button id = "tagsButton" class="tab-button" onclick="openTab(event, 'Tags')">标签</button>
<button id = "yearsButton" class="tab-button" onclick="openTab(event, 'Years')">年份</button>
</div>
<div class="content">
<div id="Years" class="tab-content">
{{ range (.Site.RegularPages.GroupByDate "2006") }}
<h3>{{ .Key }}</h3>
<ul class="archive-list">
{{ range (where .Pages "Type" "posts") }}
<li>
{{ .PublishDate.Format "2006-01-02" }}
<a href="{{ .RelPermalink }}">{{ .Title }}</a>
</li>
{{ end }}
</ul>
{{ end }}
</div>
<div id="Tags" class="tab-content">
<!-- 标签词云放这里 -->
<!-- 标签归档开始 -->
{{ $allPages := .Site.RegularPages }}
{{ range $index, $tag := .Site.Taxonomies.tags }}
<h3>{{ $index }}</h3>
<ul class="tag-archive-list">
{{ range $allPages }}
{{ if in .Params.tags $index }}
<li>
{{ .PublishDate.Format "2006-01-02" }}
<a href="{{ .RelPermalink }}">{{ .Title }}</a>
</li>
{{ end }}
{{ end }}
</ul>
{{ end }}
<!-- 标签归档结束 -->
</div>
Hugo的优势
启动更快
构建速度的确更快。
令人惊喜的短代码
在hexo中使用插件不是一件容易的事情,需要编写复杂的正则。生态也不是很好。
Hugo的短代码相对来就简单很多,也很像现在前端框架里的组件概念。
编写和使用都很简单,以douban卡片举例:
在主题文件夹中,/layout/shortcodes/下,新建一个douban.html 。接受一个url,通过正则,获取url中的subjectId,从本地的book.json中遍历找到对应书的信息,然后渲染到模版代码里。
{{ $dbUrl := .Get 0 }}
{{ $dbType := replaceRE `https://(movie|book).douban.com/subject/.*` "$1" $dbUrl }}
{{ $dbID := replaceRE `.*douban.com/subject/([0-9]+)/.*` "$1" $dbUrl }}
{{/* {{ printf "Page Params: %#v\n" $dbID }} */}}
{{ if eq $dbType "book" }}
{{$items := resources.Get "data/douban/book.json" }}
{{ $json := $data | transform.Unmarshal }}
{{range $item := $json}}
{{ $subjectId := string $item.subject_id}}
{{if eq ($subjectId) $dbID }}
{{ $rating := float ($item.douban_score) }}
<!--封面地址替换 -->
{{ $imagePath := printf "images/douban/%s.jpg" (path.Base ($subjectId)) }}
{{ $defaultImg := "images/default/default_poster.jpg"}}
<div class="db-card">
<div class="db-card-subject">
<div class="db-card-post"><img loading="lazy" decoding="async" referrerpolicy="no-referrer" src="{{ $imagePath | absURL }}" ></div>
<div class="db-card-content">
<div class="db-card-title"><a href="{{ $dbUrl }}" class="cute" target="_blank" rel="noreferrer">{{ $item.name }}</a></div>
<div class="rating"><span class="allstardark"><span class="allstarlight" style="width:{{mul 10 $rating }}%"></span></span><span class="rating_nums">{{$rating}}</span></div>
<div class="db-card-abstract">{{ $item.card_subtitle }}</div>
<div class="db-card-comment">{{ $item.intro}}</div>
</div>
</div>
</div>
{{end}}
{{end}}
{{ end }}
做一个短代码来支持LivePhoto吧!
知道了原理就可以很容易开发短代码了。我做了一个LivePhoto的。
Apple的LivePhoto本质就是一张图 +一小段视频 (.mov),我们可以从icloud将图和视频下载下来。
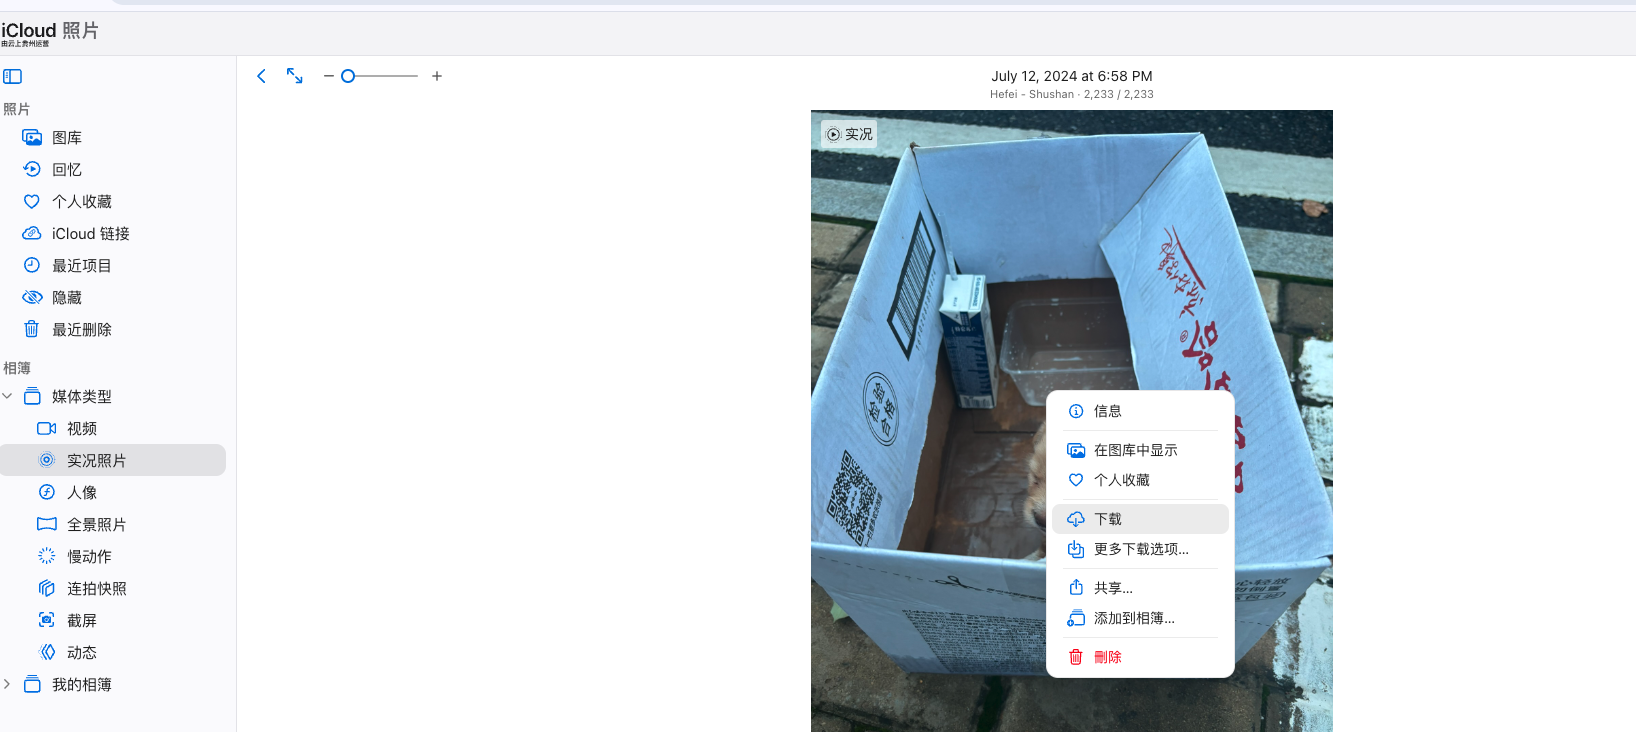
注意要选择兼容性最好的选项,不然可能显示不出来。
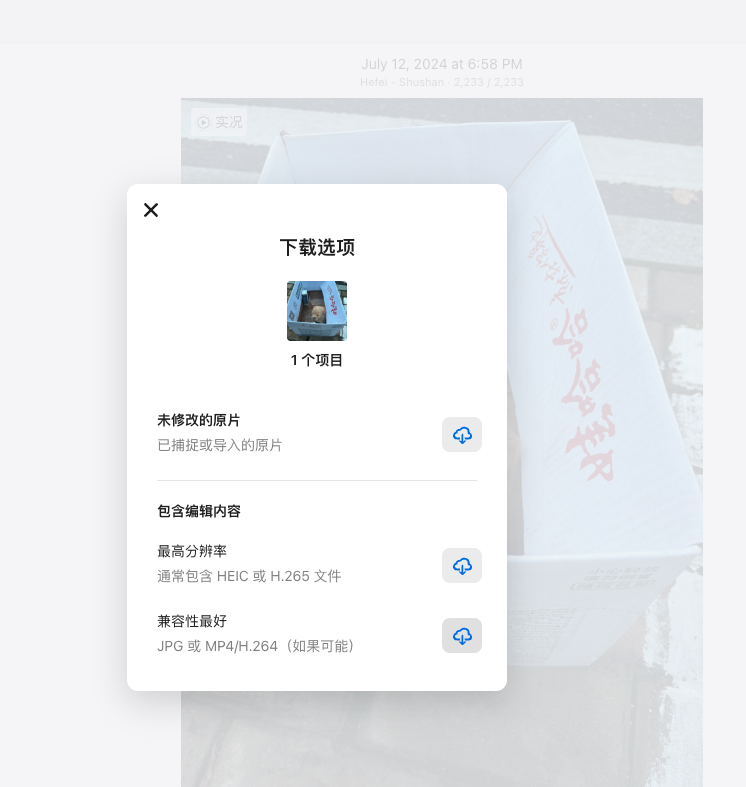
下载下来后是一个压缩包zip,里面包含一个jpeg文件和一个mov文件。解压后传到自己图床上。
短代码中需要引入apple的cdn文件。
<!DOCTYPE html>
<html lang="en">
<head>
<meta charset="UTF-8">
<title>Live Photo Example</title>
<script src="https://cdn.apple-livephotoskit.com/lpk/1/livephotoskit.js"></script>
</head>
<body>
<!-- Live Photo Element with dynamic ID -->
<live-photo id="{{ .Get "id" | default "default-live-photo-id" }}"
photo-src="{{ .Get "photo" }}"
video-src="{{ .Get "video" }}"
style="width: {{ .Get "width" | default "300" }}px; height: {{ .Get "height" | default "400" }}px;">
</live-photo>
<script>
document.addEventListener("DOMContentLoaded", function() {
// Using the dynamic ID to create the LivePhotosKit player
const livePhotoId = "{{ .Get "id" | default "default-live-photo-id" }}";
const player = LivePhotosKit.Player(document.getElementById(livePhotoId));
// Set photo and video sources dynamically
player.photoSrc = "{{ .Get "photo" }}";
player.videoSrc = "{{ .Get "video" }}";
// Event listeners for player states
player.addEventListener('canplay', evt => console.log('Player is ready', evt));
player.addEventListener('error', evt => console.log('Player load error', evt));
player.addEventListener('ended', evt => console.log('Player finished playing through', evt));
// Playback controls and styles
player.playbackStyle = LivePhotosKit.PlaybackStyle.FULL;
player.play();
// Error handling specific to live photo elements
player.addEventListener('error', (ev) => {
if (typeof ev.detail.errorCode === 'number') {
switch (ev.detail.errorCode) {
case LivePhotosKit.Errors.IMAGE_FAILED_TO_LOAD:
console.error('Image failed to load');
break;
case LivePhotosKit.Errors.VIDEO_FAILED_TO_LOAD:
console.error('Video failed to load');
break;
}
} else {
console.error('Unexpected error:', ev.detail.error);
}
});
});
</script>
</body>
使用时传入刚刚的mov和jpeg图片地址即可。
Live Photo Example
路边一只被抛弃的可怜的小狗
在请求自己的图床时,发生跨域错误,需要到Cloudflare上配置一个Worker和Worker Rule,解决跨域问题。
新建worker,并配置图床绑定的子域名下/*的woker rule
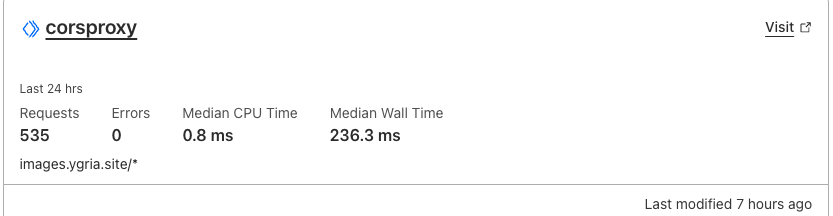
允许本地开发ip和部署后的ip即可。(要注意地址末尾没有斜杠)
addEventListener('fetch', event => {
event.respondWith(handleRequest(event.request))
})
async function handleRequest(request) {
const origin = request.headers.get("Origin");
let response = await fetch(request);
// Create a new response by cloning the original response
response = new Response(response.body, response);
// Check if the origin is one of the allowed origins
const allowedOrigins = ["https://ygria.site", "http://127.0.0.1:5500","http://127.0.0.1:1313"];
if (allowedOrigins.includes(origin)) {
// Set CORS headers
response.headers.set("Access-Control-Allow-Origin", origin);
response.headers.set("Access-Control-Allow-Methods", "GET, POST, OPTIONS");
response.headers.set("Access-Control-Allow-Headers", "Content-Type");
}
// Handle OPTIONS preflight request
if (request.method === "OPTIONS") {
response = new Response(null, {
status: 204,
headers: response.headers
});
}
return response;
}
其他折腾
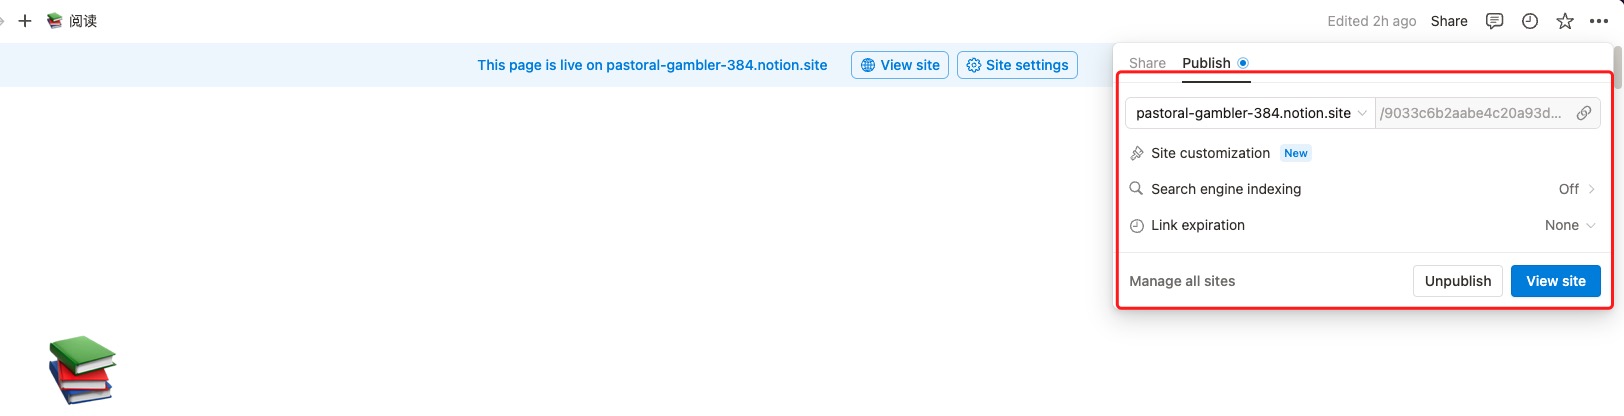
Notion的快速建站
Notion页面支持直接发布成网页,我将自己的读书和播客页面都进行了发布,并绑定了子域名。
在Cloudflare控制台增加一条CNAME,指向notion.so
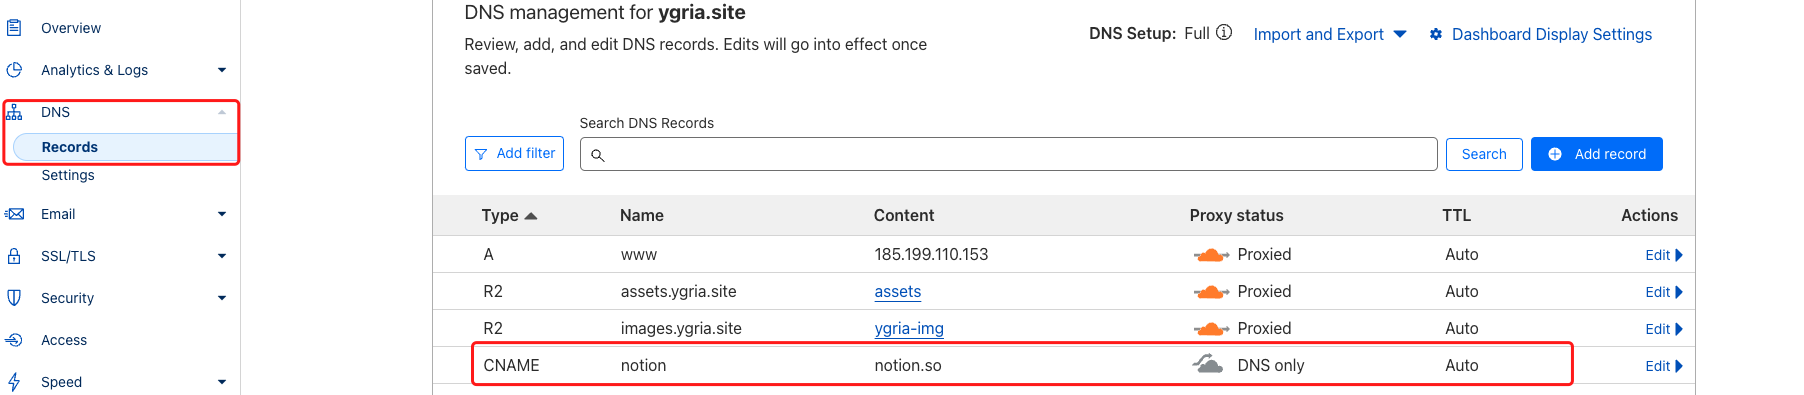
新增一个worker,同样配置worker rule,将所有访问notion.ygria.site/*的请求都定向到worker。worker内容可以访问
生成worker。
如下图,可以定义多个二级路由和notion页面的关系。
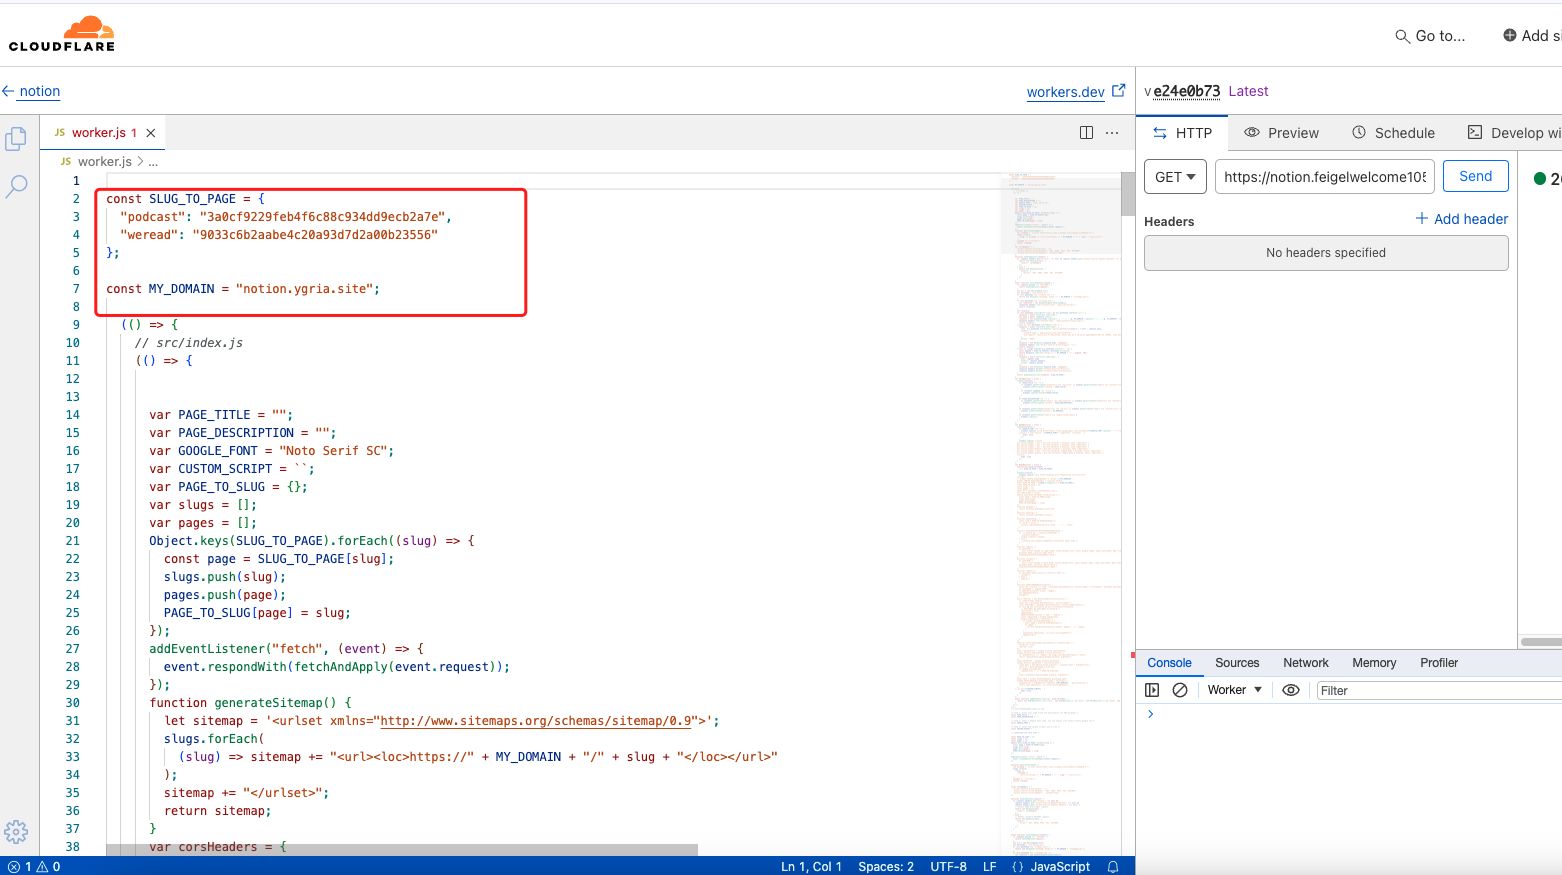
现在,通过notion.ygria.site/podcast 和 notion.ygria.site/weread 就可以访问到我的两个notion公开页面了。并且都是实时更新的,真不错~
Emoji 页头
参考
把 emoji 当作 favicon ,加入了这一小小的功能彩蛋。
总结
-
搜索教程过程中,看到了很多做得很棒的个人博客。不过对于我来说,坚持写博客才是最重要的~
-
评论和memos等等都暂时还没做,对我来说也不是核心功能。
-
chatgpt、github和cloudflare,帮助折腾的利器。自动化流、workspace、函数计算、页面托管、S3存储,都是免费的,还都很好用。
%20--%3E%0A%3Csvg%20width%3D%22400%22%20height%3D%22362.25%22%20version%3D%221.1%22%20viewBox%3D%220%200%20105.83%2095.845%22%20xml%3Aspace%3D%22preserve%22%20xmlns%3D%22http%3A%2F%2Fwww.w3.org%2F2000%2Fsvg%22%3E%3Cg%20transform%3D%22matrix(.713%200%200%20.713%2077.075%2071.416)%22%20fill%3D%22none%22%20stroke%3D%22%2320b2aa%22%3E%3Cg%20transform%3D%22matrix(1.7758%200%200%201.7758%20-218.04%20-53.747)%22%3E%3Cg%20transform%3D%22matrix(1.0075%200%200%201.0075%20-117.66%20-102.15)%22%20fill%3D%22none%22%20stroke%3D%22%23008000%22%3E%3Cg%20transform%3D%22translate(6.3294%2021.625)%22%3E%3Cg%20transform%3D%22translate(2.2098%2031.932)%22%3E%3Cg%20transform%3D%22translate(143.47%20-53.536)%22%20stroke%3D%22%2320e0cd%22%3E%3Cpath%20transform%3D%22translate(-2.2098%20-31.932)%22%20d%3D%22m81.211%20180.38%2019.707%200.26372%22%20stroke-width%3D%223.683%22%2F%3E%3Cg%20transform%3D%22translate(-.36252)%22%3E%3Cpath%20d%3D%22m89.544%20146.87v-6.794%22%20stroke-width%3D%222.6458%22%2F%3E%3Cpath%20d%3D%22m88.77%20141.34%206.6272-8.1886%22%20stroke-width%3D%222.3347%22%2F%3E%3Cpath%20d%3D%22m89.919%20141.46-5.5766-5.8386%22%20stroke-width%3D%222.3102%22%2F%3E%3C%2Fg%3E%3Ccircle%20cx%3D%22100.95%22%20cy%3D%22126.47%22%20r%3D%226.9136%22%20stroke-width%3D%222.6458%22%2F%3E%3Ccircle%20cx%3D%2279.351%22%20cy%3D%22130.4%22%20r%3D%225.0854%22%20stroke-width%3D%222.6458%22%2F%3E%3C%2Fg%3E%3C%2Fg%3E%3C%2Fg%3E%3C%2Fg%3E%3Cg%20transform%3D%22matrix(1.4025%200%200%201.4025%2078.297%20-26.312)%22%20fill%3D%22none%22%20stroke%3D%22%232e8b57%22%3E%3Ccircle%20cx%3D%2234.846%22%20cy%3D%2231.29%22%20r%3D%223.9152%22%20stroke-width%3D%221.8521%22%2F%3E%3Ccircle%20cx%3D%224.8413%22%20cy%3D%2231.29%22%20r%3D%223.9152%22%20stroke-width%3D%221.8521%22%2F%3E%3Cpath%20d%3D%22m9.2604%2052.775h21.167%22%20stroke-width%3D%222.6458%22%2F%3E%3Cpath%20d%3D%22m19.844%2053.834v-37.849%22%20stroke-width%3D%222.5838%22%2F%3E%3Cg%20stroke-width%3D%222.6458%22%3E%3Ccircle%20cx%3D%2219.844%22%20cy%3D%227.1851%22%20r%3D%225.739%22%2F%3E%3Cpath%20d%3D%22m6.6146%2037.959%205.2917%205.2917h7.9375%22%2F%3E%3Cpath%20d%3D%22m33.073%2037.959-5.2917%205.2917h-7.9375%22%2F%3E%3C%2Fg%3E%3Ccircle%20cx%3D%2231.804%22%20cy%3D%2217.056%22%20r%3D%223.9152%22%20stroke-width%3D%221.3229%22%2F%3E%3Ccircle%20cx%3D%227.884%22%20cy%3D%2217.056%22%20r%3D%223.9152%22%20stroke-width%3D%221.3229%22%2F%3E%3Cpath%20d%3D%22m9.2604%2023.406%2010.583%202.6458%2010.583-2.6458%22%20stroke-width%3D%222.6458%22%2F%3E%3C%2Fg%3E%3Cg%20transform%3D%22translate(61.911%20-10.894)%22%3E%3Cpath%20d%3D%22m8.1887%2058.6h23.31%22%20stroke-width%3D%223.7108%22%2F%3E%3Cg%20transform%3D%22translate(0%203.7438)%22%3E%3Ccircle%20cx%3D%2233.971%22%20cy%3D%2233.263%22%20r%3D%224.79%22%20stroke%3D%22%2320b2aa%22%20stroke-width%3D%221.8527%22%2F%3E%3Ccircle%20cx%3D%225.716%22%20cy%3D%2233.263%22%20r%3D%224.79%22%20stroke-width%3D%221.8521%22%2F%3E%3Cg%20stroke-width%3D%222.6458%22%3E%3Cpath%20d%3D%22m19.844%2053.743v-25.896%22%2F%3E%3Ccircle%20cx%3D%2219.844%22%20cy%3D%2218.683%22%20r%3D%227.0212%22%2F%3E%3Cpath%20d%3D%22m6.8958%2040.795%2012.948%203.237%2012.948-3.237%22%2F%3E%3C%2Fg%3E%3C%2Fg%3E%3C%2Fg%3E%3C%2Fg%3E%3C%2Fg%3E%3C%2Fsvg%3E%0A)